Call it the most cherished time of the year as you can go for fancy excursions or jollo with your favorites. Or you may simply call it yet another “the dog days of summer”, an open patio is downright intolerable because of the sultry temperature uproaring outdoors. In a bid to make your alfresco experience promising, incorporating an outdoor sun shade sail will be your all-time favorite summer accessory.
Besides, sheltering you from the scorching heat, UV rays, downpours, dust, etc., a shade sail for patio upscales the structural aesthetics, making your summers more meaningful and enjoyable.
You may install them in residential spaces, restaurants, or at places with relatively extreme temperatures. Their installation is quite easy and effortless. It takes only a few tools and a few minutes- and it’s a complete transition. Bonus point, if your custom sun shade sail features waterproof sun shade fabric that goes a long way.
Best of all, they are perfect if you do not like permanent structures like a gazebo or pergola but still want good coverage from the sun.
Things to Consider Before Setting Up a Sun Shade Sail
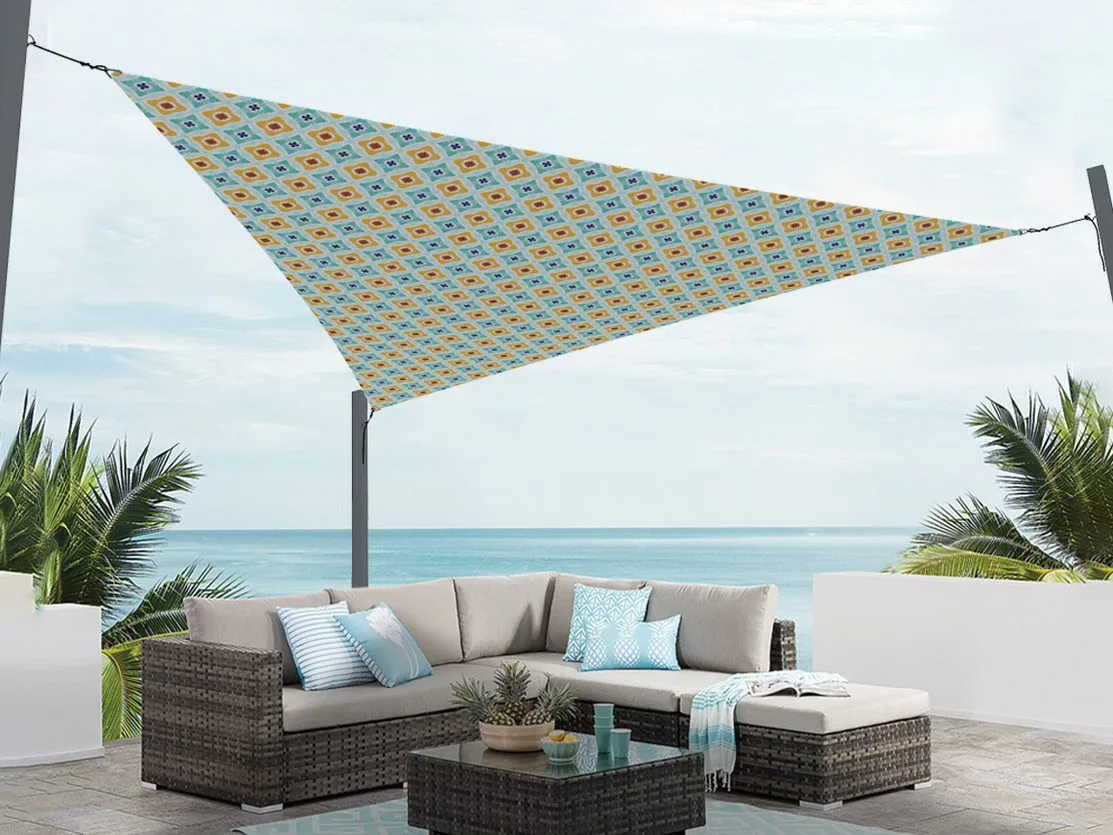
For a successful shade sail installation to house, consider pint-sized details to channel the broader perspective. That includes selecting a location, finding the appropriate mounting points for the corners, and coordinating the placement of the ‘brise-soleil’. Now look for existing support structures such as fascia, fence posts, a wall, or trees (use trees only for a temporary purpose, make sure the trees are at least 9.75 inches).
Design, Shape, Size, Fabric, & Placement
Although sail orientation plays a significant role in maintaining the overall aesthetics and integrity, don’t forget to keep the practical side in mind. For example, look for the sun’s ecliptic rather than the arena you want to install the shade. Keep the shade sail distant from open flame sources like grills and fire pits as the chemicals and the heat can rob the life of the fabric.
It might get overwhelming for you when it comes to decision-making. You might have to decide upon the practical concern vs style part, try striking a balance. If you opt for a triangle sun shade sail with sharply asymmetrical corners, you surely will have an exotic outdoor décor but may offer less shade. However, here is the deal- if you have a space crunch then a triangle shade sail will work perfectly for you. But for a large area, you can use two triangular shades placed in a way that offers a total sun breaker.
For complete coverage, a rectangle sun shade sail can maximize the coverage. To boost visual interest, choose the vibrant rectangle shade sail. Try not to incline the sail as it could be perilous to the gusty winds.
To achieve the perfect look, a snug fitting is a must. A custom shade sail will offer snug fitting and won’t get loose during windy days. Coming on to the fabric part, consider a waterproof sun shade sail that will not succumb to weather elements easily.
Look for anchor points for the sail where you can establish them or use existing ones, and access their strength compared to the wind forces you anticipated. Here is the gist:
- Decide the location according to the sun exposure or the path of the sun and your desired coverage spot.
- Select the design and shape that best fits your space.
- Sail fabric, size, and fitting.
- Find the location for the anchor points and evaluate their strength.
- Check the wind speed.
Mounting Hardware & Accessories
A shade sail generally uses similar mounting hardware to link, anchor, and extend. Here are some common hardware and accessories that you will need to mount the shade:
Links: Turnbuckle, Snap hook / Carabiner, S-hook, D-shackle
Extensions: Chain, Cable, Non-stretching rope
Anchors: Pade Eye, Eye Lag Screw
Tool: Screwdriver
Different Ways to Install a Shade Sail on a Deck
A sun shade sail can be installed over a deck in a number of ways. Sails usually require additional support such as a post (permanent or temporary) and multiple attachment points to get the right tension and strength. If you have an existing structure, anchoring the sail will require minutes.
How to Install a Shade Sail to Fascia or Side of the House
Generally, the fascia of your home is attached to the ends of trusses or rafters. If you use the fascia to anchor a shade sail, it could come off very easily. Placing additional supports such as L-brackets or hurricane hangers within 2 to 3 feet of each anchor point on the fascia will reinforce the installation. For shade sail exceeding 150 square feet, ensure the structural integrity is reliable.
- Spread the shade sail out in the designated area. It will give you an idea of how it will look post-installation.
- Attach the Shade to the pressure-treated wood post or a steel post or a tree (temporary). A steel post, however, is much better for long-term usage as it won’t get affected by weather elements.
- Mark the point where you want to place the post. Mark ‘X’ using a spray or set some rocks.
- Screw the eye lags or bolts into the post.
- If you are using other attachment points to install the hardware in your house, you will need to add a fascia support bracket. The bracket will strengthen the area to avoid pressure on the fascia.
- Attach the turnbuckles and carbines or snap hooks to the sail that will help you adjust the tension.
- Slip the hooks on the other sides of the turnbuckle into the eye attachments. Turn the turnbuckle to increase the tension on the attached corners. If the corners are smaller, use carabiner hooks instead.
- Lastly, secure the last corner by stretching out the tension strap, hook it on the last eye attachment.
How to Install Additional Supports – Wooden Post
A pressure-treated wood post/steel post (a steel post is much more reliable and won’t rust anytime soon), or steel pipe reinforce the installation process. Here are the steps to install a wooden post:
- Place the sail on the deck to determine the position of the posts. Ensure to leave sufficient space -approximately 2 to 3 feet, for the cable or rope that fix the sail to the post.
- Drill a hole to place the post. Make sure it is deep enough for at least one-half the length of the exposed pole.
- Place the sail on the deck to determine the position of the posts. Ensure to leave sufficient space -approximately 2 to 3 feet, for the cable or rope that fix the sail to the post.
- Now place the post in the hole, add temporary braces to hold it and fill the hole with concrete and leave it to set for 24 hours or until it gets affixed.
Do’s & Don’ts for Better Upkeep of Your Sun Shade Sail
Do’s
- Rinse off dirt and tree debris from the shade sail with a hose to prevent stains. For in-depth cleaning, gently scrub the sail using water and a light detergent.
- Use a gentle/mild detergent.
Don’t
- Avoid washing the sail in the washing machine.
- Do not use stiff brushes and harsh cleaners containing chlorine.
Enjoy Your New Heavy-Duty Waterproof Shade Sail!
It’s quite easy to install an outdoor sun shade sail, making your backyard a more pleasant place to enjoy with your pals, even when it’s freaking hot. But it’s always a choice that matters the most and can make your outdoor setting a hit. Always make sure to pick the best waterproof sun shade sail. Both waterproof rectangle sun shade sail and a triangle sun shade sail, act as a decent barrier from rain, water, UV rays, dust, and debris.









Recent Comments